
Are you feeling the pressure of Valorant’s intensity? Is the relentless Ranked grind starting to wear down your mental resilience? Perhaps you’ve encountered those pesky problems like the dreaded “critical error occurred,” Windows TPM 2.0, or Secure Boot issues in Valorant. Regardless of your situation, bidding farewell to Valorant may have crossed your mind, either to take a break or resolve these infuriating glitches. If you’re leaning towards uninstalling Valorant, fear not, as we’re here to provide you with a straightforward, step-by-step guide on how to uninstall Valorant.
Why Uninstall Valorant? Are There Any Restrictions?
Are you encountering a slew of issues and pesky errors in Valorant? It happens to the best of us. Sometimes, the best remedy for these hiccups is a clean slate, a fresh installation. Those troublesome culprits like VAN9001, VAN 128, VAN -102, VAN -104, and their ilk often bow down to the power of a clean reinstall. But there are other motives to bid adieu to this game, perhaps the nerve-wracking ranked grind or the unwelcome toxicity.
Now, if you’ve found your way here because you’re struggling to install Valorant and an error is standing in your way, there’s a reason for that. You see, uninstalling Valorant is more complex than your run-of-the-mill software. The culprit behind this inconvenience is the vigilant Riot Vanguard anti-cheat system. Vanguard stands guard, making it a tad tricky to bid farewell to Valorant in the usual fashion. This can be quite a headache for gamers who must be more meticulous in following the uninstallation steps.
You may also need to know more about the Valorant crosshair database, which you can use further to maximize your Valorant game.
How to Completely Uninstall Valorant from Your Windows 10/11 PC
Are you saying goodbye to Valorant? We’ve got you covered! Follow these straightforward steps to bid farewell to Valorant and ensure a smooth uninstallation process, free from any pesky interruptions.
1. Disable Vanguard
Before diving into the uninstallation process, let’s start by disabling Vanguard, the anti-cheat system. Here’s how to do it:
- Locate the Windows system tray in the lower-right corner of your screen. Look for the Vanguard icon and right-click on it.
- A context menu will appear. Select “Exit Vanguard” from the options.
- A prompt will pop up, confirming your action. Click “Yes” to halt the Vanguard anti-cheat service on your computer.
Apart from how to Uninstall Valorant, which you can find out, you can also increase the FPS in Valorant to get extraordinary graphics in Valorant and get the most out of it.
2. Uninstall Riot Vanguard
Now that Vanguard is out of the way, let’s move on to the next crucial step – uninstalling the Riot Vanguard anti-cheat system. This step is essential for a successful Valorant removal. Here’s how to do it:
- Press the Windows key + I on your keyboard to open the Settings app.
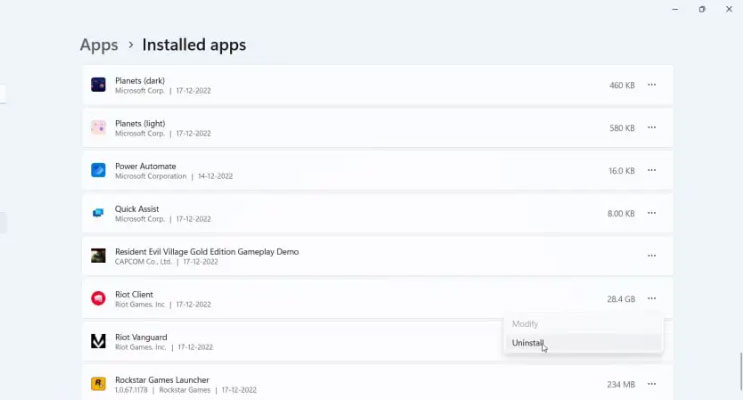
- Navigate to the “Apps” section within the Settings app.
- You’ll see a list of installed apps on your system. Locate “Riot Vanguard” in this list.
- Click on “Riot Vanguard,” then hit the “Uninstall” button. Follow any on-screen prompts to complete the uninstallation of Vanguard anti-cheat.
3. Uninstall Valorant Properly
With Vanguard out of the way, we can uninstall Valorant and remove all associated game files from your Windows PC or laptop. Here’s how to do it:
- Please return to the Apps list using the Windows key + I shortcut to open the Settings app.
- Within the Apps list, find “Valorant.”
- Click on “Valorant,” then click the “Uninstall” button to initiate the removal of Valorant from your Windows 10/11 PC.
4. Remove Any Leftover Files
After completing Step 3, restart your system to ensure no lingering Valorant files remain. Follow these steps to double-check:
- Open File Explorer.
- Click on the address bar at the top and paste the following location: C:\Riot Games.
- Press “Enter” to open the Riot Games directory.
- Delete any remaining folders you find within this directory.
- This final cleanup will completely eradicate Valorant from your system.
Uninstalling Valorant Using CMD
Sometimes, the standard steps may not work due to various issues. In such cases, you can manually uninstall Vanguard and Valorant using Command Prompt. Ensure that you’ve exited Vanguard from the Windows system tray before proceeding. Here’s how:
- Press the Windows key or access the start menu.
- Type “CMD” to locate the Command Prompt.
- Right-click on “Run as administrator” in the right pane.
- This will open the Command Prompt in administrator mode. Now, paste the following commands one by one and press “Enter” after each order:
sc delete vgc
sc delete vgk
- After executing the commands, restart your system and open File Explorer.
- Navigate to C:\PROGRAM FILES\.
- Delete the “Riot Vanguard” folder to remove Valorant from your system.
- With these steps, you’ll bid adieu to Valorant without a hitch!
Hopefully, with this article on how to Uninstall Valorant, you can find out more to further improve the gameplay you play. Want to Top Up Valorant? You can do it at UniPin right now.